Yet another bathroom makeover

This bathroom in Horizon on Bay (the condo makeover was featured in a previous post) needed a makeover baaaad.

It hadn’t been updated in a long time and while some of the features were okay, overall it was very tired.

Minimizing costs and thinking of ease of maintenance, we installed an acrylic liner over the existing tub tiles and then tiled the entire bathroom from floor to ceiling. The vanity and toilet were fine, so we simply changed the mirror and light fixture and installed a new curved shower rod.

A big big difference without breaking the bank. Unfortunately the before photos were lost in a computer meltdown 😦


Posted in Bathroom Makeovers | Leave a comment

Another bathroom makeover

I am not a fan of blue and this bathroom was full of it. Blue walls, blue ceiling, blue vanity top, blue in the floor…it was everywhere.

In addition, the bathroom was very dated, mid 80s and desperately needed an update.

Everything needed to be changed.

We tiled the whole bathroom, installed a new vanity, faucet, light fixture and toilet, and had the tub refinished. To keep costs down, we installed an acrylic shower liner over the existing tiled tub surround rather than re-tile.

The result is fantastic. Up to date, masculine and a very peaceful and relaxing space.


Posted in Bathroom Makeovers | Leave a comment

St. Annes

This stacked town home in Toronto’s Bloor West neighbourhood had not been touched in 15 years. In fact, it still had the original builder’s paint on the walls.

We were called in to get the place ready for sale. The entire home was re-painted top to bottom, the carpet and linoleum were replaced by a laminate floor and the kitchen was madeover in white with a new subway tile backsplash added.

The home was a basement unit and the white kitchen and new flooring went a long way to brightening up this dark space.


Posted in Before and Afters, Home Staging | Leave a comment

Liberty Village II – Master Bath Makeover

Everything about this Liberty Village loft was tired and outdated, especially the master bath.


One of the most important parts of my work is splitting up my client’s budget to get the most value for the money spent.

This bathroom needed help desperately, but we didn’t want to break the bank as there were so many other things that demanded our attention and resources.

So, to keep the costs in check, rather than gut the bathroom and do a complete reno, we simply replaced the vanity and faucet, toilet, mirror and light fixture and opted to have the tub refinished. With a fresh coat of paint, the result is fantastic and breathed new life into a tired old bathroom.


Posted in Bathroom Makeovers, Before and Afters | Leave a comment

Liberty Village II – Kitchen Makeover

I was not a fan of the golden oak flooring and cabinets in this stunning loft, nor the boring tile backsplash. The oak looked dated and didn’t seem to fit the character and charm of the space with it’s brick wall and concrete ceilings.


To be able to install the new backsplash, the old one had to first be taken off and of course the wall behind it came with it.


So new drywall had to be hung so we would have a smooth solid surface for the new tiles.


With a nice clean wall, we could lay the new tiles in place. I went for square 1/2 tiles as opposed to the linear tile that was there before. I love linear tiles, but in here, they just weren’t working for me.


The dark wood floor ties in much better with the dark slate tiles in the kitchen. Choosing a wood floor in a similar tone as the slate gave much better flow to the space.

Next came the task of painting out the kitchen cabinets. I chose white to brighten up the dark windowless kitchen and give a more contemporary feel. We also installed some 1″ X 3″ pine under the cabinets to conceal the under cabinet lighting.


Brighter, cleaner, more interesting, more contemporary and sooooo much nicer.


Posted in Kitchen Makeovers | Leave a comment

Liberty Village II – Another closet makeover

Recently I’ve had the pleasure of working on a fantstic loft in probably my favourite neighbourhood in Toronto, Liberty Village.

Liberty Village is an amazing development on reclaimed railway lands with new condos and lofts, old converted warehouses and tons of shopping and dining.

This is my second of three projects in the area and hopefully I’ll be able to do a lot more.

This loft is an older one, a bit tired and run down and needed some updating bad. The flooring and kitchen cabinets were a golden oak reminiscent of the 80s, the bedroom carpet was tired and worn, the bathrooms were in desperate need of a makeover and the bedroom closet was just awful.

An awkward L-shape with a bunch of random coat hooks all over the place. Not the best use of space in a storage challenged loft. You can see in this photo that the carpet has been replaced with a vintage looking dark oak floor.


This closet began like all the others by tearing out the existing shelving and hooks and patching and painting the walls giving us an empty space to work with.


This closet was a particular challenge not only because of the narrow, awkward L shape, but also because of the low ceiling with two access panels.

We bought a stock system from Closetmaid and then had to cut everything down to fit both vertically and horizontally.


The result is a closet that while tight is very functional with tons of storage for both hanging and folded clothing.


Posted in Before and Afters, Closets and Storage Solutions | 1 Comment

Transforming unused space

A few years ago I worked on a 100 year old home and one of the biggest challenges with old homes (besides the crooked walls and uneven floors) is the lack of storage. After all, back then people didn’t own much, not like today, so closets and storage weren’t a huge consideration.

The clients had installed a wall of freestanding wardrobes in the master bedroom which, while providing a tremendous aount of storage, limited their options as to furniture placement.

Their bed was against the wall just inside the door and left no room for night stands, but the only other availabe wall had the chimney running up from the fireplace below.


I really wanted the bed against the chimney wall, but with the chimney pretty much in the centre of the wall, it wasn’t an option, until I decided to build a half wall flush with the chimney.

This gave us the opportunity to re-orient the bed, add a headboard and provide some shelving as well as give space for two floating night stands.


To provide even more storage, we built a window seat to take advantage of the empty space in the large bay window.


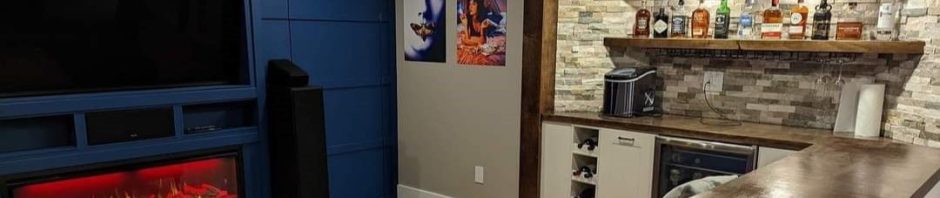
Finally, in the living room, we made over the fireplace which was in an awkward position at the edge of a wall. We extended the wall, building it out and added a built in bookcase.

This centred the fireplace on the wall. We clad the fireplace in MDF, mounted the TV above and put some shelving inside the fire box to house the audio video components. The client had no intention of using the fireplace so this was a brilliant use of space.


When you live in an old home, or any home that lacks storage, you have to get creative and look for any opportunity to create more space.

Sometimes, de-cluttering, while critical, simply isn’t enough.
Posted in Closets and Storage Solutions | Leave a comment

The Liberties

The best thing about early 80s condos is the size. They’re so much larger on average than condos built today. The worst thing is they tend to be a little dated and somewhat rundown.

That was the case in this Gerrard Street West condo which was badly in need of an update. The carpet was worn, the lights were horribly out of date and the bathroom was, well,  just awful.

The solarium was being used as a dining room but the glass doors closed it in and made the whole living area feel cramped.

We took the doors out, replaced the carpet with a laminate floor, painted the whole place and updated the lighting and bathroom.

Welcome to the new millenium. What a transformation!


Posted in Before and Afters | Leave a comment

Amica

This 600 square foot condo at Bayview and Sheppard is the first home of a young, professional woman. She needed lots of storage (as do most condo owners) and wanted a space that is warm, cozy and feminine.

The only thing she owned was a mattress and a beautiful Persian rug that became the inspiration for the colour scheme in soft creams and whites and bold silvery blues and grays.

It is beautiful and feminine and my client is absolutely delighted!


Posted in Before and Afters | Leave a comment

Adding elegance with wainscoting

Wainscoting (adding wood panels between the baseboard and the chair rail) dates back to the 16th century when it was applied to the lower portion of interior walls to counteract the cold and dampness associated with stone walls.

It is still very popular today as a relatively inexpensive way to enhance the beauty of your home or to hide imperfections in your walls.

It is, in my mind at least, a very traditional look and not right for everyone, but, if you’re looking for a way to add elegance and a touch of class to your home, you really can’t do much better than wainscoting (except perhaps crown moulding).

Recently, we added wainscoting to the main living area of a north Toronto condo and the results are beautiful.

You can buy prefab wainscoting panels at any big box store, but we opted to make our own.

Here’s how the condo looked before we began.


We started by taking 2′ X 4′ X 1/4″ sheets of MDF and ripping them into 5″ strips which we added to the wall along the baseboards and at a height of 34″. We then painted the wall above the wainscoting a new colour (Revere Pewter by Benjamin Moore) and added a chair rail cap to the top.


Next we added more MDF strips vertically evenly spaced out to create “boxes”.


Then came the tedious time consuming task of adding trim cap to the inside edges of all the boxes and patching the seams with wood filler.


Then a couple of coats of white satin paint.


The finished result is beautiful and elegant. A HUGE improvement.

Posted in Woodworking | 3 Comments